B_deep_toolset: a Deep Comp Survival Kit
tl;dr: a very useful deep compositing toolkit you probably want to use.
installation guide
So first things first, let´s place the Python script where it can be reached so that we can actually use the tools.
Distribute the code
Download the script from the link below and save it as a Python file called "b_deeptoolset.py" where Nuke can find it. In other words, place it within the Nuke Plugin Path. For more info, read my previous posts or Google it, there are tons of tutorials on how to do this.
code
Download FileAdditionally (although very much encouraged) download and install the "dDot" Python module available in Nukepedia. Please note that I have included a few (but not all) unmodified functions from this module inside my "b_deeptoolset.py" so that you can still use the ''Autocomp'' feature even if you don´t have installed "dDot". Needless to say, All dDot's related functionality credit goes to its creator Daniel Bartha.
Edit the menu.py file
Now we have the "b_deeptoolset.py" Python module where Nuke can find it, we´re gonna import it by adding the following line to our menu.py :
import b_deeptooset
Save the menu.py and restart Nuke.
2 - Try it
You'll notice that there are a couple of new menus on your menu bar, namely: "b_deeptoolset" and "dDot". If this is the case, congratulations, we are ready to start using the Toolkit. Otherwise please make sure the Python script is saved where Nuke can find it, and that is named with exactly the same name you are using to import it from your ''menu.py''.
DEEP HOLDOUTS
user guide
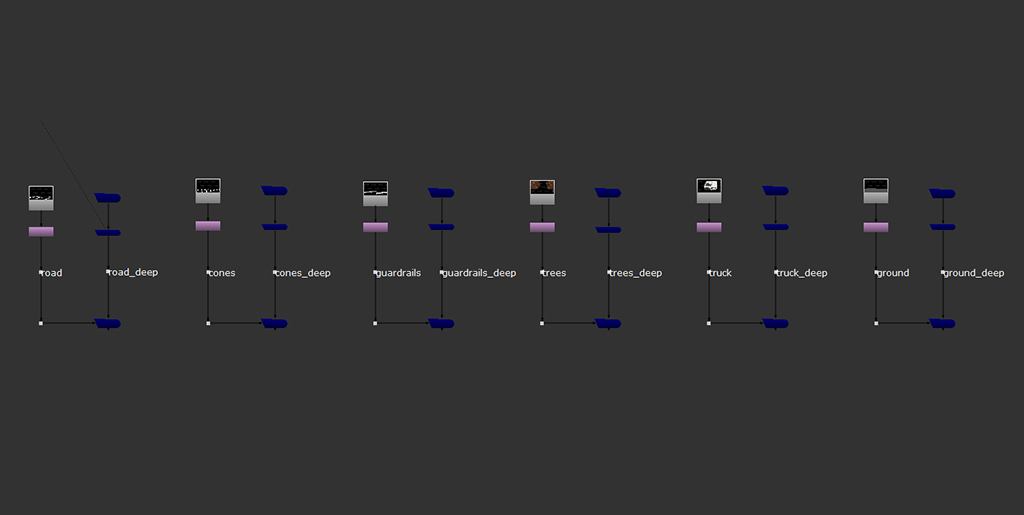
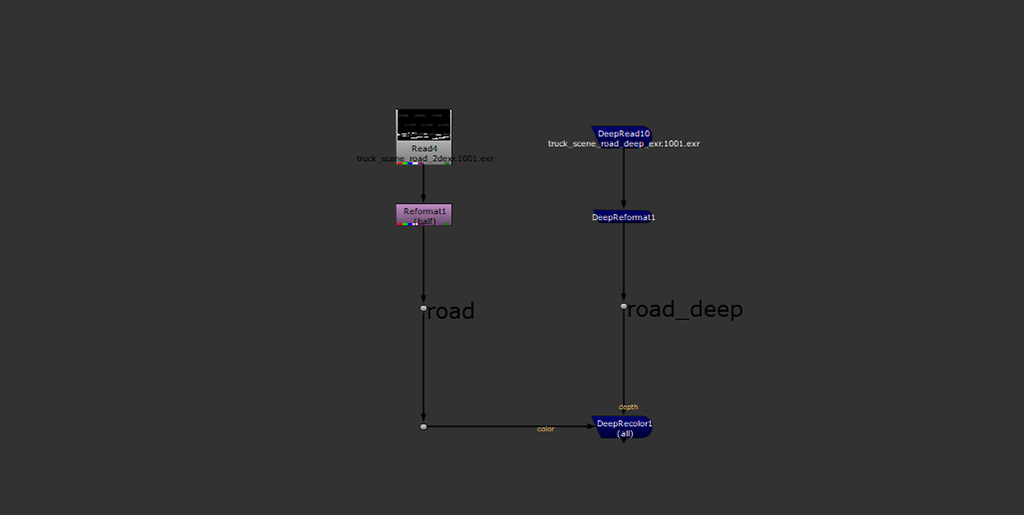
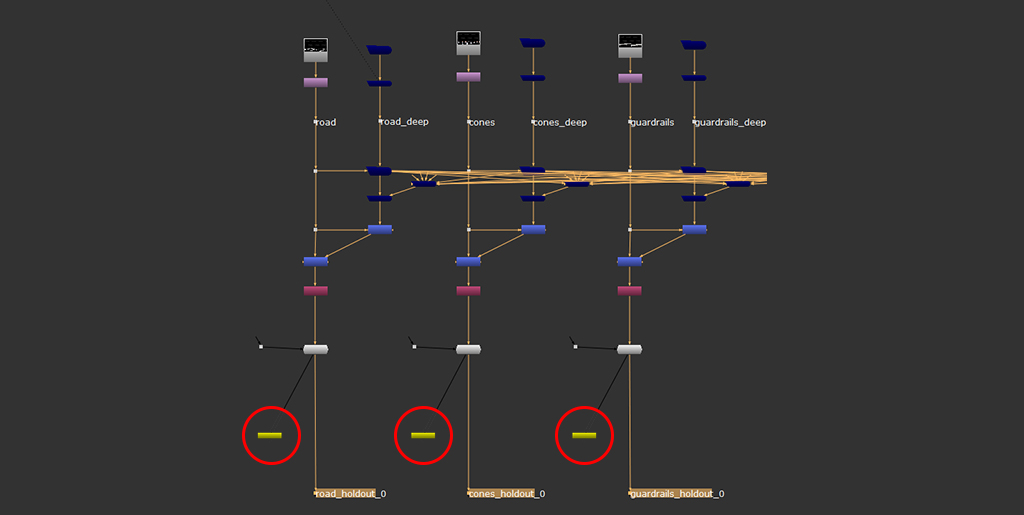
- 1 - Make sure each CG element and its Deep Data is connected to the corresponding inputs of a DeepRecolor node.
- 2 - Make sure each DeepRecolor node has the target input alpha checked, and channels set to all.
- 3 - Make sure the regular 2d element is on the left-hand side and the DeepRead on the right. Also, it's gonna look better with a dot creating a right angle between the DeepRecolor and the regular 2d element. Like so:
- 4 - To make it Autocomp ready, please drop a couple of dDot nodes, as shown above, named according to the following convention. To drop the dDots, either use the hotkey "Shift+." or go to the "dDot" menu and run the "dDotParent" tool. A little Nuke Panel will pop up for you to input the name. Once done that, just click OK and a new dDot node will be created.
- 4.1 - For the regular 2d input name, please use any alphanumeric string. It may be as long as you need and could use camel case in case you want to include several words. Please avoid empty spaces or underscores. For instance, all these would be valid names:
- "road",
- "2dRoadCam1"
- "whatEverYouWantAsLongAsItIsInOneWordWithNoSpacesOrUnderScores1212"
- 4.2 - For the deep input, just add a "_deep" trailing to the former name. For instance:
- "road_deep".
- 4.3 - Please note that if you don't drop dDots there, everything will still work fine, just without the Autocomp feature. And by the way, the dDots are just regular Dot Nodes with an additional hidden Knob that allows for smart linking and that type of stuff. They won't cause any trouble otherwise!
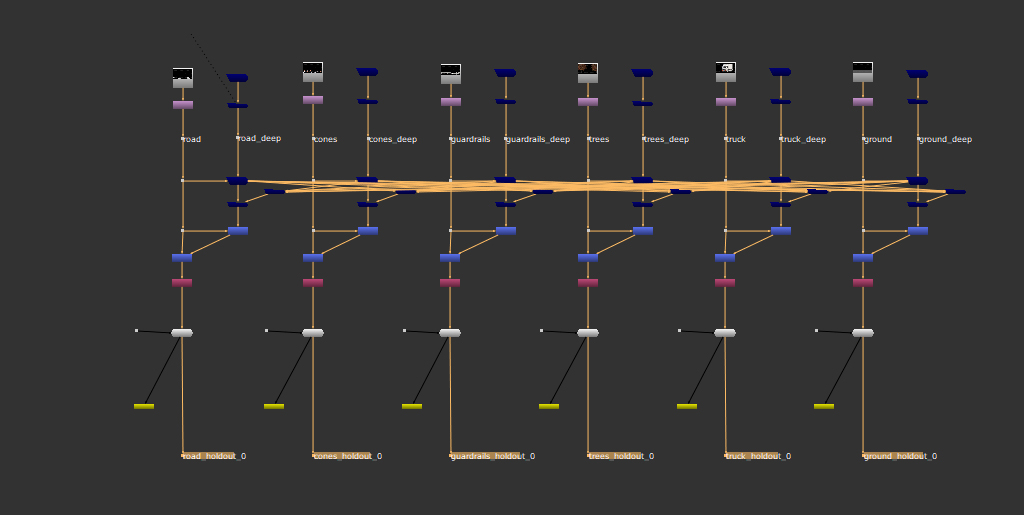
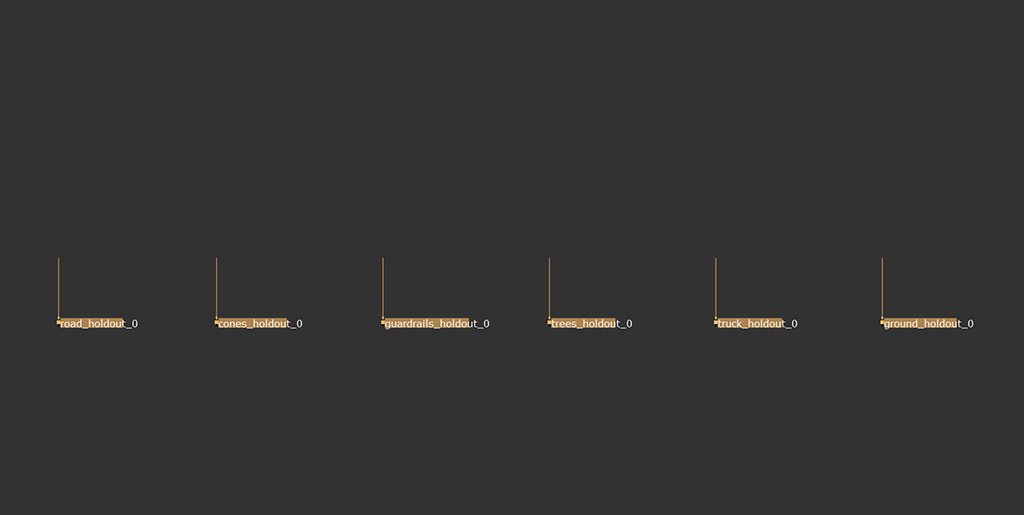
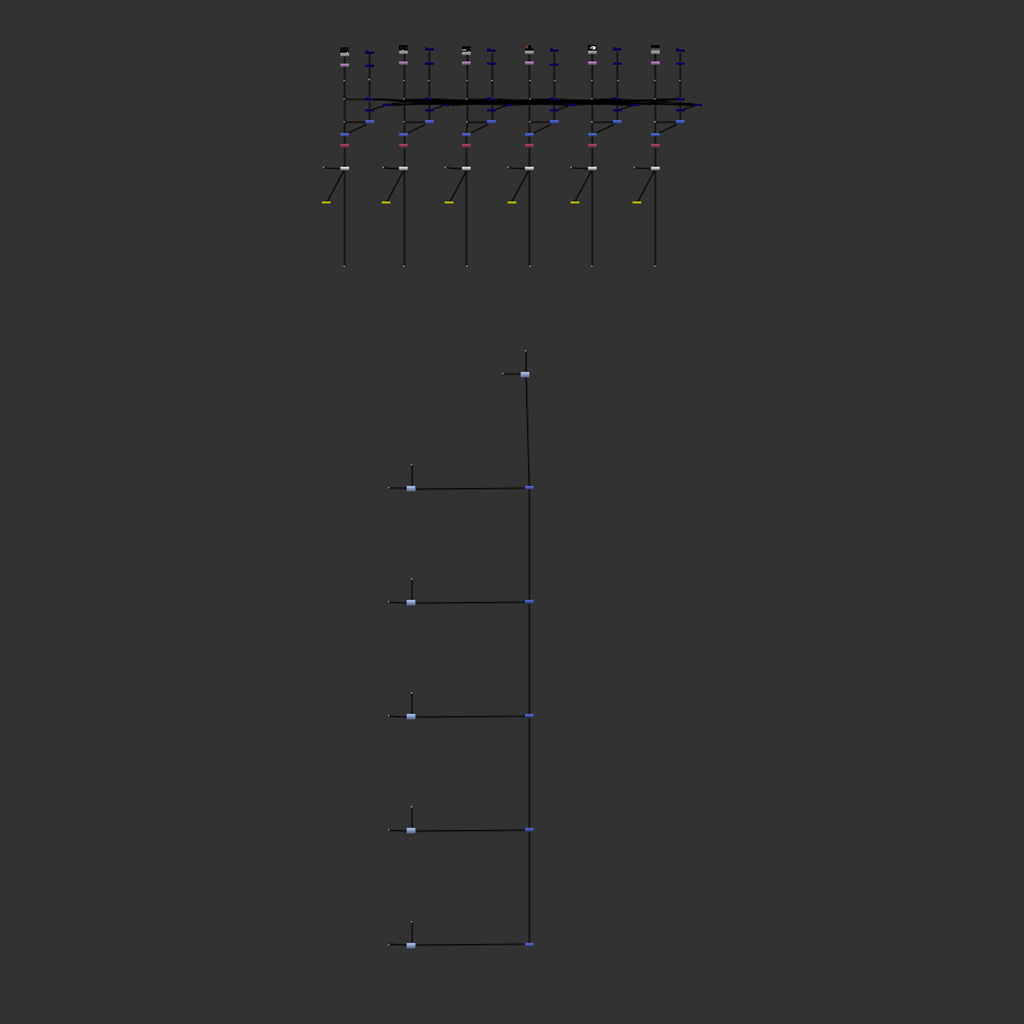
- 5 - Voila, select all your DeepRecolor (and only DeepRecolor ) nodes and click on the "create_holdouts" button. If everything goes fine, this is what you'll get:
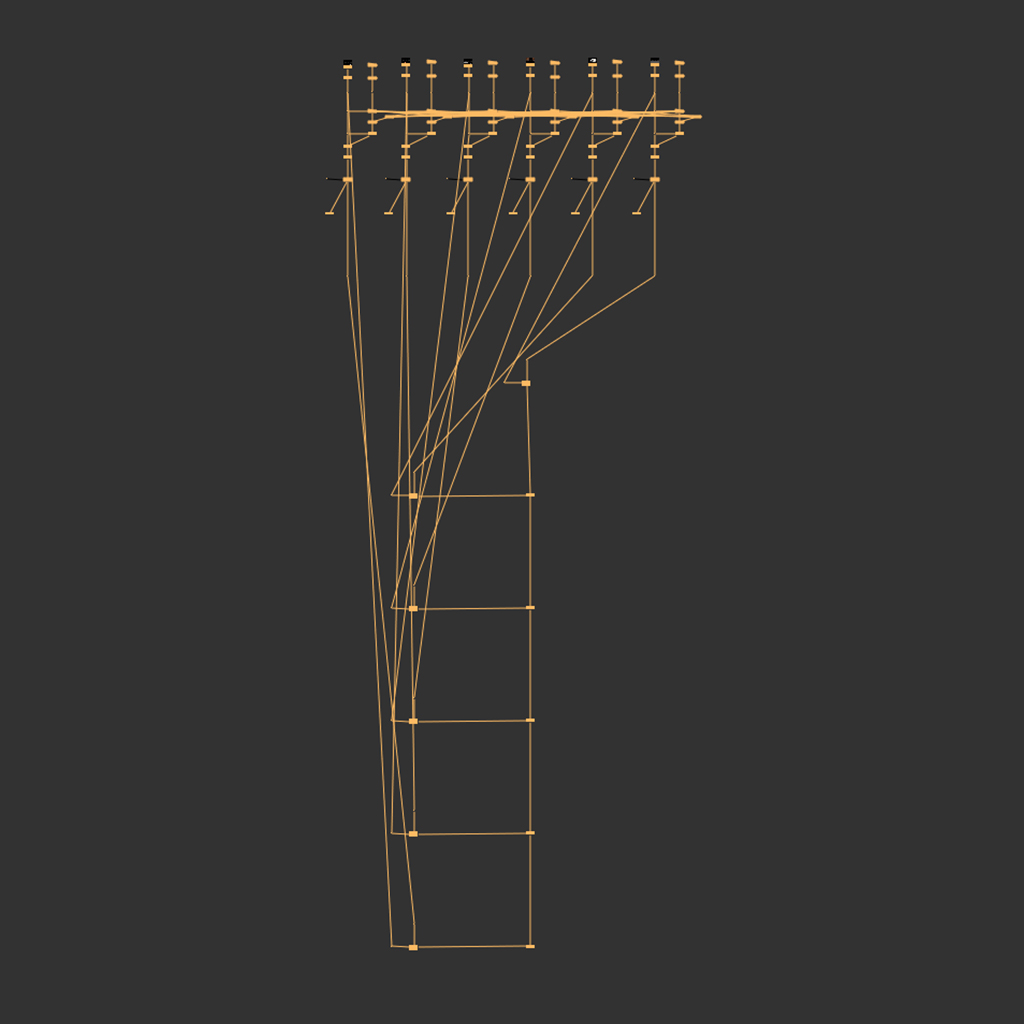
AUTO COMP
Having obediently complied with above's procedure, and provided you chose to drop the dDots using the hotkey or the dDot menu as suggested, now you can auto comp all your CG elements together in literally less than a second just by clicking a button.
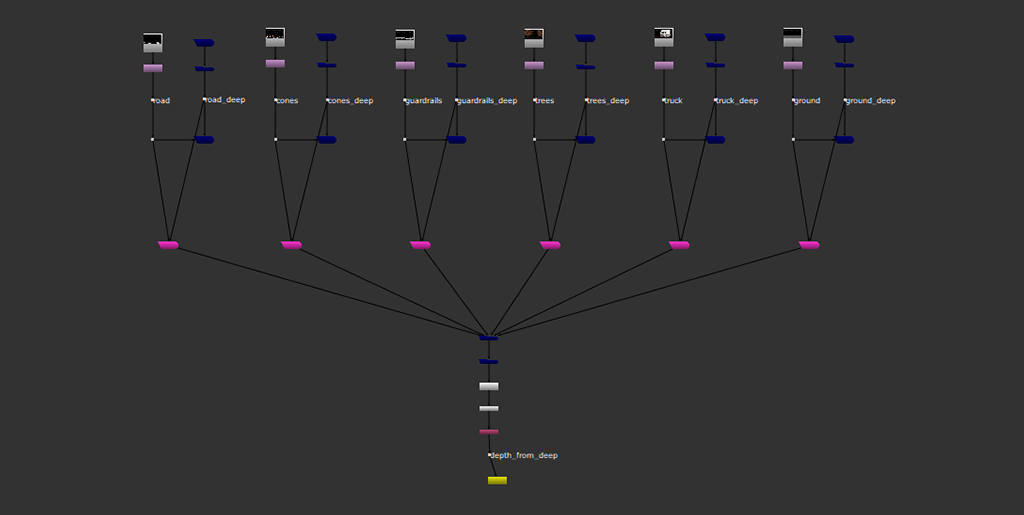
DEEP_UBERPASS
Sometimes, you will get a bunch of different CG elements with deep data that you would rather want to have combined in one big ass pass.
What the Uberpass tool does is precisely combining all your CG elements and its AOVS, on the one hand, and all the deep data, on the other.
This way you will still have all the sweetness of working with deep but with a reduced amount of complexity and overhead.
Instructions

2 - As you see, there are two DeepMerge setups: one for rendering out all the combined color together with all the AOVS, and the other to DeepWrite out the combined deep data.
3 - Render those out and bring them back in the comp. Now you should have a combined color input with all AOVS and a new DeepRead node reading all combined deep data. Just connect them together with a DeepRecolor node and you are good to go.
DEPTH_FROM_DEEP
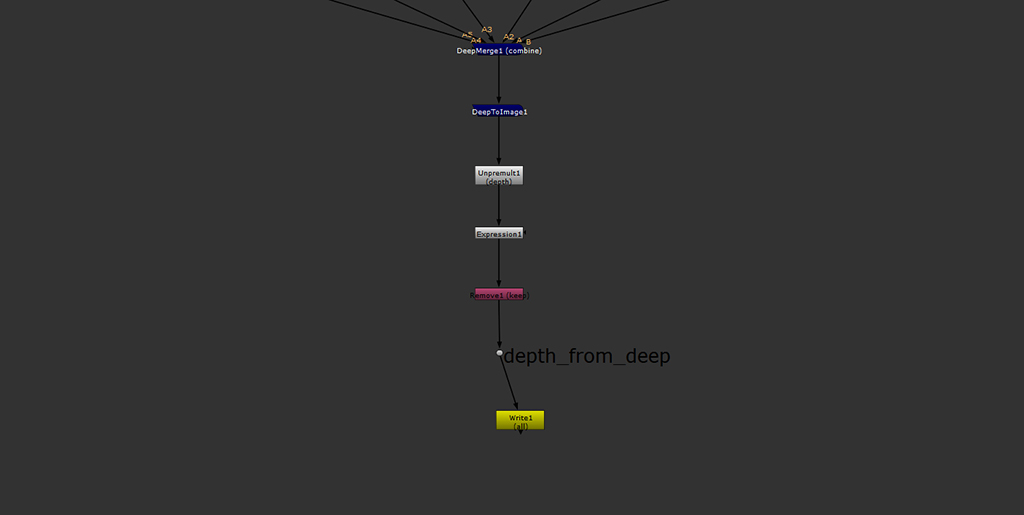
4 - Finally, just pre-comp it and use it where needed in the comp