A FEW SIMPLE PYTHON TOOLS TO MAKE COMPING LIFE JUST (A BIT) EASIER.
tl;dr: some useful Python snippets for Nuke.
b_procedural_backdrop
1 - How to use it
So first things first, let´s place the code where it can be reached, create a new Nuke Menu and set up a shortcut.
Distribute the code
Download the script from the link below save it as a Python file called "b_procedural_backdrop.py" where Nuke can find it. In other words, place it within the Nuke Plugin Path file structure. For more info, read my previous posts.
Edit the menu.py file
Now we have the Python module where Nuke can find it, we´re gonna add the following lines to our fantastic menu.py so that we can effectively use it:
import b_procedural_backdrop.py
n_menu = nuke.menu('Nuke')
b_menu = n_menu.addMenu('MenuName')
b_menu.addCommand('b_procedural_backdrop.py', b_procedural_backdrop.main_function()', 'ctrl+a')
Save the menu.py and restart Nuke.
2 - Try it
You'll notice that there is a new menu in your upper menu bar, listing the new 'b_procedural_backdrop' command and its Hotkey. Just select a bunch of nodes and press 'alt+a '(it´s the hotkey we set up earlier, obviously you can change this to any other of your convenience). A Nuke Panel like this one should appear:

As you can see, there are a few parameters to deal with:
- Note Size: set your note size.
- Label: set your label.
- Align: left, right or center.
- Color: pick your color, or throw the dice with random option.
- Amount: how many backdrops you want.
- Axis: horizontal or vertical layout.
- Spacing: set the spacing between your backdrops
Here is a Backdrop Layout example to give you an idea of this would look like:

Additionally to the backdrops, as you can notice a dotted spine is created close to the layout so that you can use it as the main spine of your comp, in case that would be of your interest.
code
download b_procedural_backdropb_ibkstacker
1 - How to use it
After having installed the code and assigned it to a shortcut like in the first example, just select an IBK Colour Node and run the tool. A Nuke Panel like this one should appear:
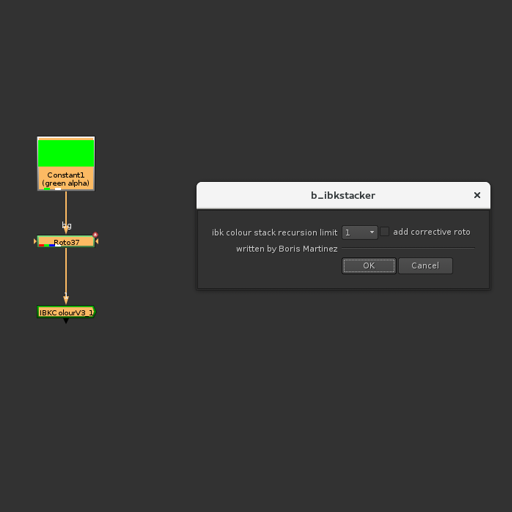
As you can see, there are a few parameters to deal with:
- ibk colour stack recursion limit: a drop-down menu that allows you to specify the recursion limit of your IBKColour Node stack.
- add corrective roto: a checkbox that will merge a clamped roto under your first IBKColour to help clean up the clean plate.
Now simply select from the drop-down menu the recursion limit and check the "add corrective roto" button if necessary. Having done that, click OK and in short time you will have a stack of IBK Colour Nodes linked via expressions to the first one, along with an IBK Gizmo connected both to the Clean Plate and to the Plate.

Alternatively, if you checked the "add corrective roto" checkbox, you would have something like this :
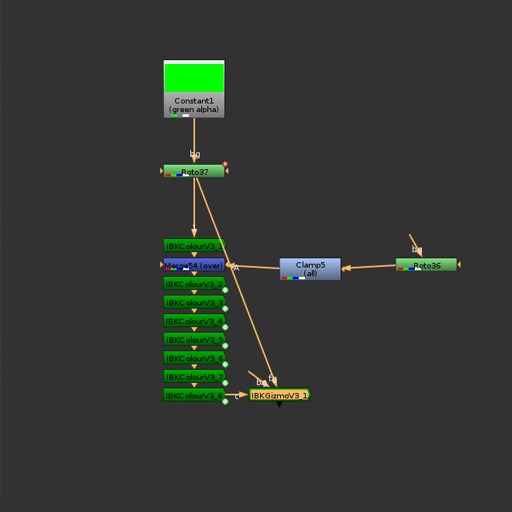
There you go, a fully automated IBK stacking system that will save you a brief time each time you use it.
code
download b_ibkstackerb_distance_normalizer
1 - How to use it
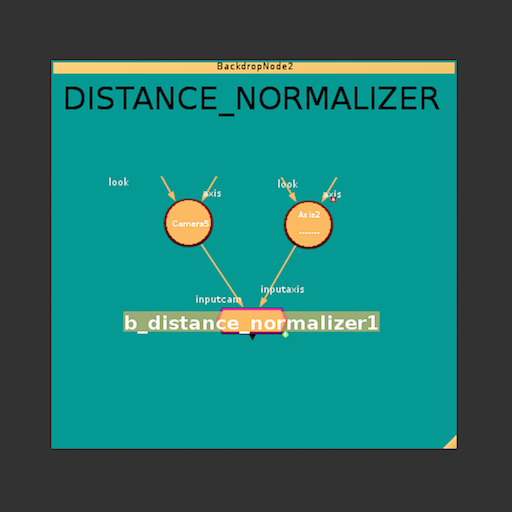
This time we are dealing with a Gizmo that has two inputs: "inputcam" & "inputaxis". Note that you can plug any 3d Node that has a "Translate" Knob.
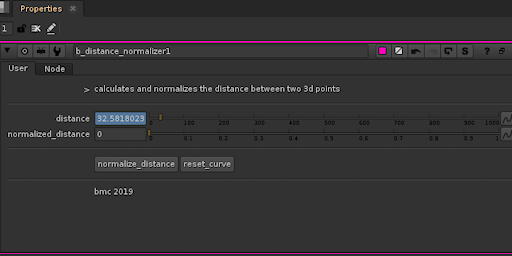
On the properties bin you will find four knobs:
- distance: displays the distance between the two inputs in world units.
- normalized_distance: displays the normalized version of the distance.
- normalize_distance: a Python Script Button that will run the code that calculates the normalized distance and creates an animated curve running from 0 to 1.
- reset_curve: resets the normalized_distance curve to 0.
So now you are unstoppable when it comes to animating stuff depending on how close or far away a specific object may be. Not that bad, huh?
code
download b_distance_normalizer Gizmo download b_distance_normalizer Python Moduleb_cam_puller
1 - How to use it
After having installed the code and assigned it to a shortcut like in the first example, just run the tool. A Nuke Panel like this one should appear:
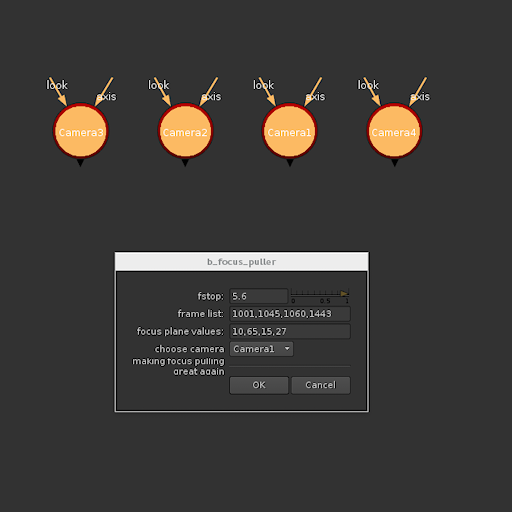
As you can see, there are a few parameters to deal with:
- fstop: sets the fstop of the selected Camera Node.
- frame_list: set here the frames you want to set focal distance values on.
- focus plane values: focal distance values correlative to the corresponding frame values.
- choose camera: lists all Camera Nodes in your Nuke Script.
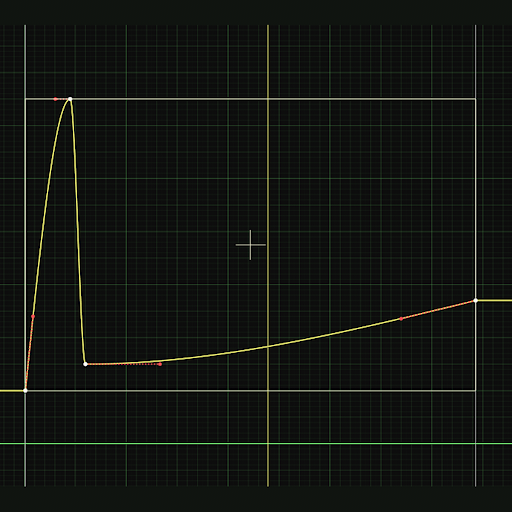
Now click OK and the selected Camera Node will have the corresponding values set up. Open the curve editor and check out the selected Camera's "focal_distance" knob. It will have an animation curve with each of the focal plane values on each of the frames in the passed frame list.
code
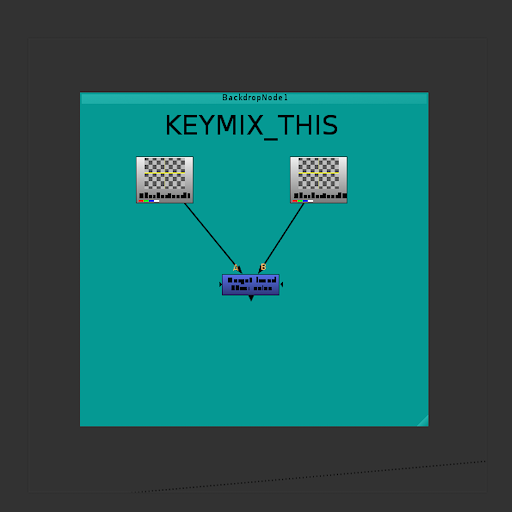
download b_cam_pullerb_keymix_this
1 - How to use it
After having installed the code and assigned it to a shortcut like in the first example, just select any node and run the tool:
before/after
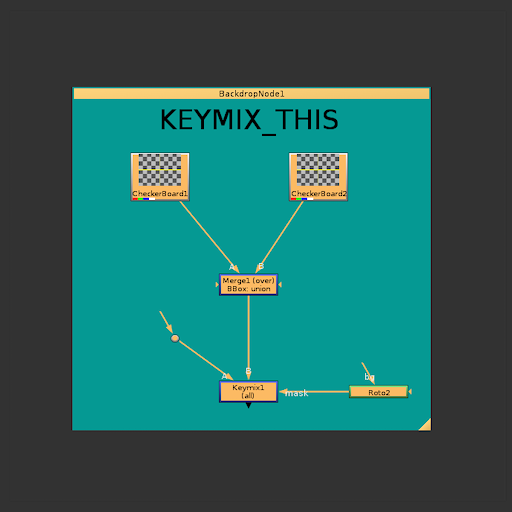
There you go, a fully automated KeyMix setup system that will save you a few seconds time each time you use it. Not too much I know, but something is something, right?
code
Download b_key_mix_this